

Step 1
Connect the LILY P4D, Pad 4 Ducking, inline on your dynamic or condenser mic

Step 3
Connect the pressure activated pad to the P4D input
LILY P4D Setup
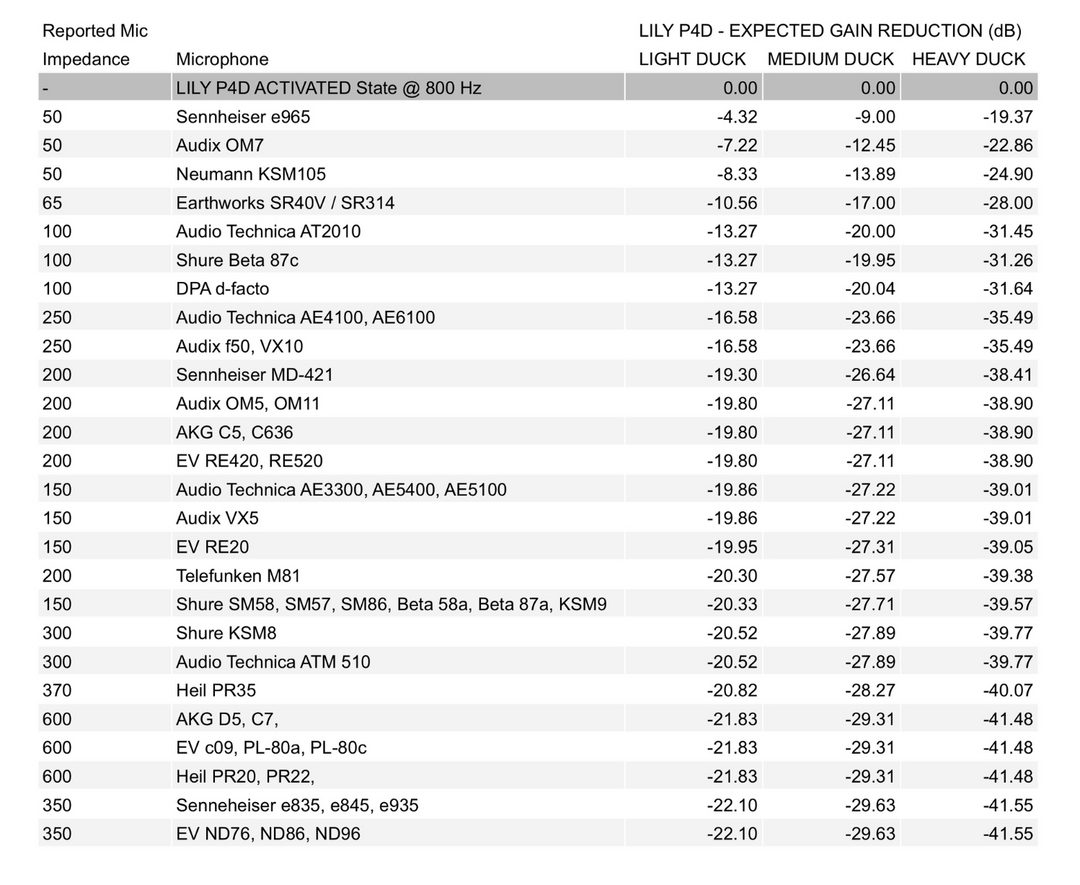
Find your mic
Locate your mic on the chart for the expected gain reduction ducking levels available on the Lily P4D Pedal.
If you don't see what you are looking for, talk to an engineer and we will provide your gain reduction levels.
FAQs
You can find the user manual on a dedicated page on our website. Simply click here to access the full manual with detailed setup instructions and troubleshooting tips.
Yes, the LILY P4D comes with a three-year warranty for the controller and a one-year warranty for the pressure mat. This warranty covers defects in materials and workmanship. For more details, you can view our full warranty policy here.
To set up the LILY P4D with your microphone, follow these simple steps:
- Connect the LILY P4D inline with your dynamic or condenser mic.
- Connect the 9V power via pedal power or the included power supply.
- Attach the pressure-activated pad to the P4D input.
For a detailed walkthrough, visit the Setup Guide at the top of this page.
The LILY P4D requires a 9V power supply, which can either come from your pedalboard’s 9V power output or the included 9V power adapter that comes with the product.
Yes, the LILY P4D works with both dynamic and condenser microphones, giving you full compatibility with a wide range of mics for any setup.